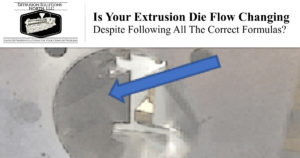
The extrusion process has many variables processers try to control. Still, one of the most overlooked variables is how heat is applied to the die via heat transfer from the heater band. Often, an extrusion cannot be produced to the same tolerance as the previous run. Work is done to the die to compensate for heat not being appropriately applied or not applied in the same manner as when the tool was hung on the extruder. There are five principles of heat transfer processers need to look for before proceeding to tooling work.
Contact
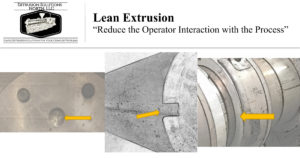
Heater bands tend to curl up away from the tooling after repeated use. Regardless of the heater system or style the processor uses to keep the heater band in contact with the tool, an air pocket will develop at some point along with the heater band after repeated use. (See the red in figure A.) This air pocket will cause the tool to be disproportional in temperature. The colder tool surface will slow the velocity of the plastic as it goes through this portion of the tool, causing the profile to run out of tolerance compared to the previous run. A gap as little as .015 is enough to change the heat disproportionately in an area of the tool.
Openings
When more than one heater band is used on the tool, the openings need to be rotated 180° to each other. If the openings are located in parallel, a cold section will develop on the tool, again causing the material to run at an inconsistent velocity. (See Figure B.) The openings are in parrel to the tool. The side of the tool with the openings in parallel will be colder than the other side. When multiple bands are required, mount every other band with the opening on the opposing side of the tool.
Heater Band Style
Manufactures make many styles of heater bands. The scope of this article is not to ascertain what style is best but rather to give awareness that not all styles apply heat equally to the tool. All bands have an opening in which no heat is applied. The heating distance from the opening back on the band varies with band style and manufacturer. The band style with a clamp not needing tools to tighten tends to have a larger area of no heat applied. (See Figure C.) Be aware of the dead space on the band being used.
Wattage
Most processers tend to overshoot the wattage required in an effort to speed up the changeover process. Plan for .035kw x in2 as a standard. Too high a wattage will overshoot the heat required. Heat temperature controllers need to be auto-tuned to the band wattage. If multiple sizes of bands are used on any one extruder per tool, standardize by making a ring to cover the tooling and use one standard size and wattage of band.
Location
The band’s location on the tooling will need to be duplicated each time the band is taken off. Ideally, the band opening and distance on the die will always be the same to repeat the melt temp across the extradite. Use some form of locating system on the die as a stop to how far on the tool the band should go on. Also incorporate some form of location for the opening of the band. When the band’s location is changed, the temperature changes, causing a shift in material flow. The velocity of the material will flow toward the path of least resistance, the hottest portion of the tool.
Before starting up the extruder, map the die heat. Using a pyrometer check the temperature on the final die plate in the four directions, North, East, South, and West. Any variation beyond 2° will require a recheck of the five heater band principles. Don’t do tooling work until the thermal conductivity is verified by means of temperature variation.